Saturday, June 5, 2010

Painting the Kitchen ~ Day 5

No pictures today.  I can't find the cable to connect my camera to the computer.  I was hoping I could continue working mornings in the garden and afternoons in the kitchen, but the chaos is driving me crazy.  I am going to do a big push on the painting today and tomorrow and then will hopefully wrap up by Monday.

Where am I at?  Let's see .... Wallpaper border all stripped off; all shiny sufaces sanded down, hardware removed.  Most of the spackling is done, except for a few big spots that I've had to keep repatching, trying to even them out.  The cabinet doors and drawers all have the first coat done.  I've cut in some of the wall area.  And that's pretty much my update.  Hopefully I can find my camera cable at some point, so that I can show the colours.

I keep wondering what my mom and dad would say.  I know my mom loved her yellow kitchen.  But, it was time to paint, so I might as well have some fun with it, right?  I think they'd mostly be happy that I am just doing something.

12 July 10 Update:  I finally found my camera cord; yes, about a month after I lost it.  Hey, at least I found it!


So, pictures.

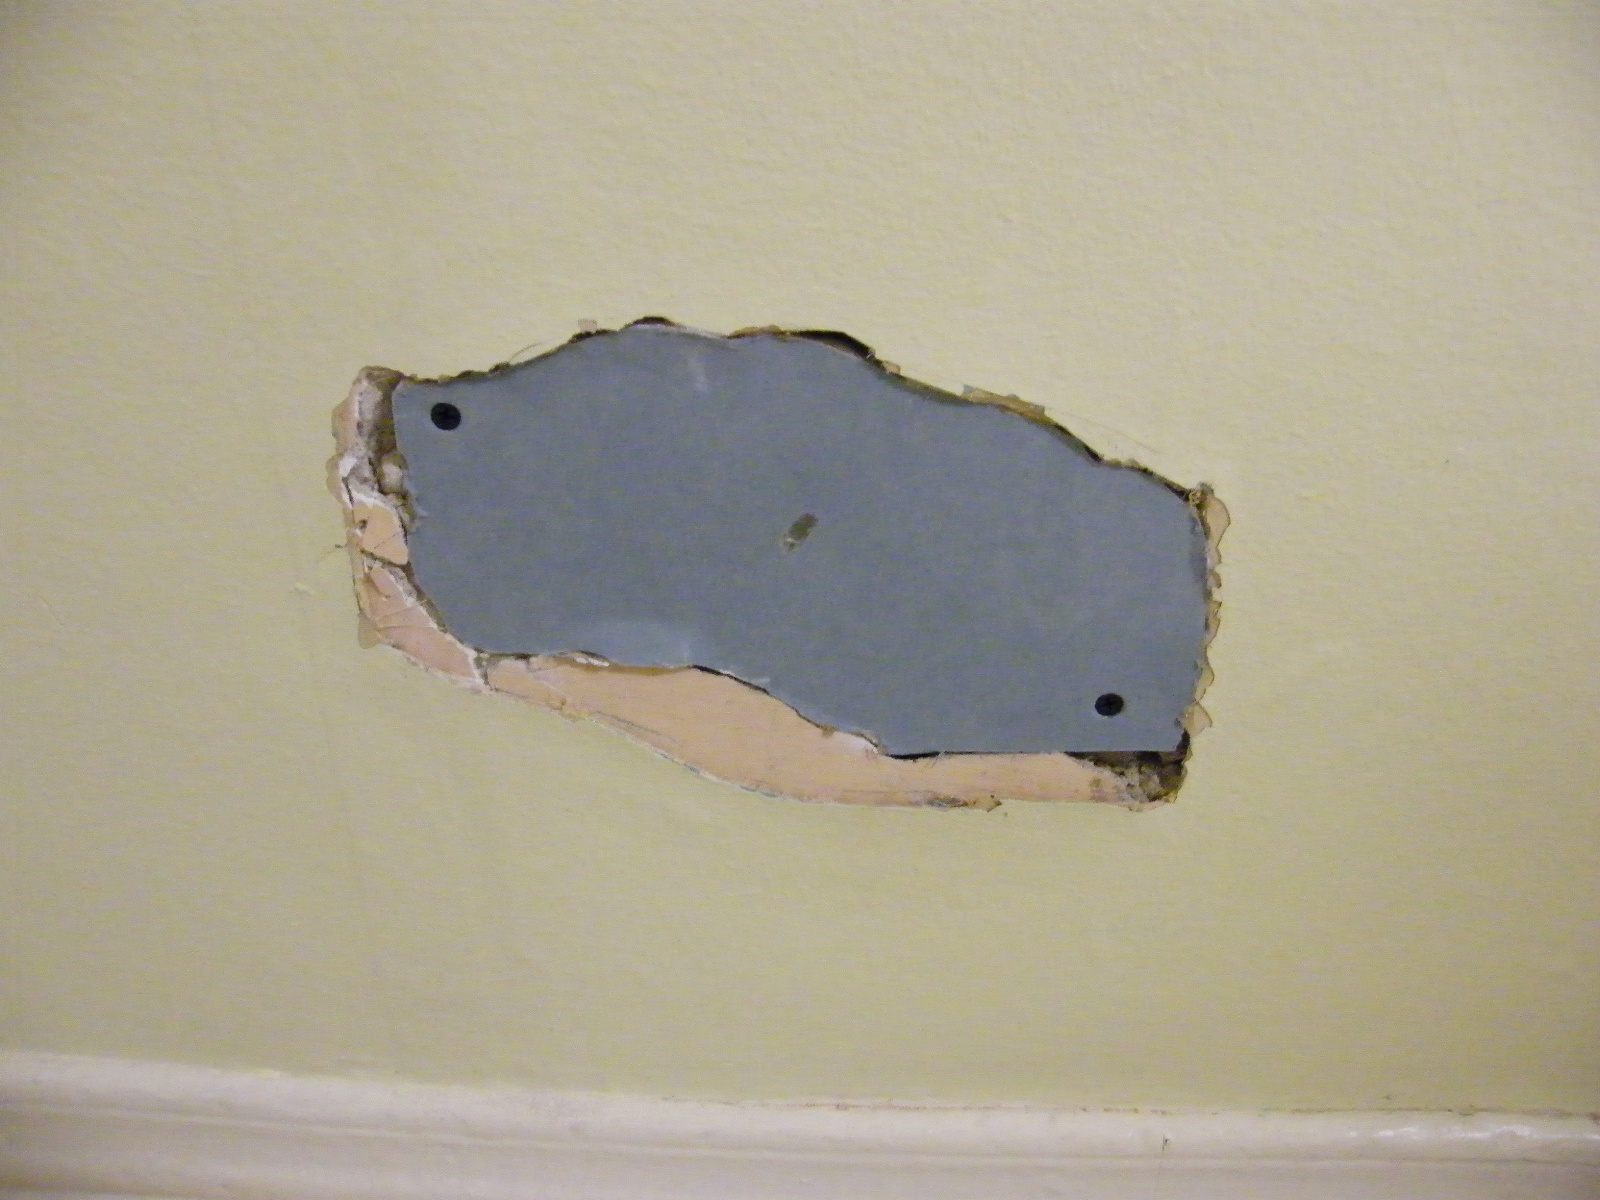
About a year ago, I had a plumbing issue, and the plumber went through my kitchen wall before realizing the pipes were actually in the bathroom.  Duh.  It seemed silly to hire someone to come and fix such a small thing, but I had no idea how to do it myself, esp. as the walls in the house are plaster (my dad was a drywaller by trade, and I helped him on many a job, but plaster I don't know).  I'm sure I did it all wrong, but I'm proud of myself all the same.  I'd say the dimensions were maybe 8ish inches by 4ish inches.  I used the waterproof gyproc, 'cause that's all I had on hand.

So, once I was all spackled up, the next thing was figuring out what to paint where.  I initially planned to paint the top part of the wall turquoise and the bottom cream.  It very quickly became apparent that the amount of cutting in between the turquoise upper wall and the cream ceiling was more cutting in than I ever want to do.  I went with turquoise on the bottom half of the wall (*wink*).  I think it was the right decision anyway ... I think the turquoise on top might have ended up being too dark; I think having the upper walls and ceiling the same colour makes the walls seem higher too.


And, so, once I got the sorted out, things started looking up.


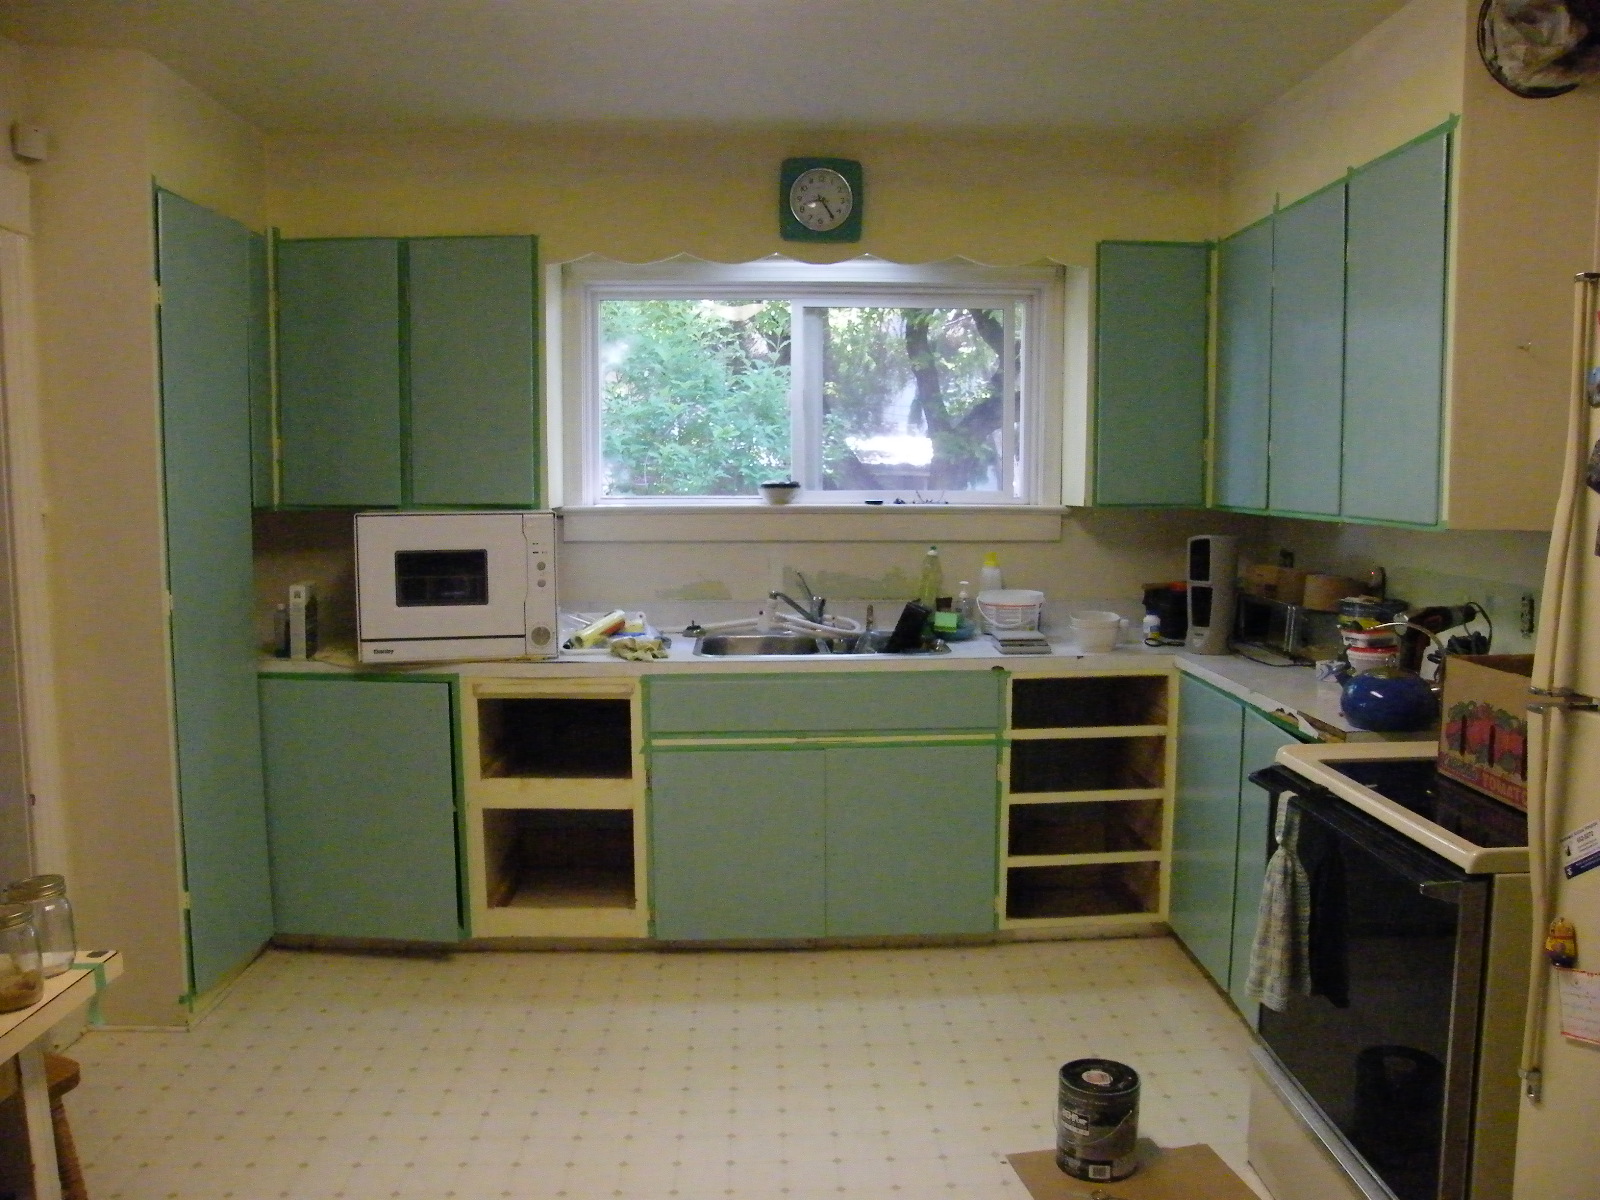
And the first coat on the cabinets (keep in mind that the background is still yellow):
Tuesday, June 1, 2010

PS to Painting the Kitchen ~ Day 1

I decided to rewatch the entire Sex and the City tv series while I am on vacation.  I got to Season 1, Episode 11 tonight, and there's Carrie painting her kitchen!  She of the $485 shoes and regular manicures.  I don't believe we ever see her taking out the garbage or plunging the toilet, so I was a little surprised she would paint her kitchen by herself.  Clearly my job isn't as "big" as I think it is!  I try to cover my embarassment by thinking "well she never eats at home, and I think she only ever actually 'cooks' fondue once in the entire six years of the series, so she probably doesn't have as much stuff to pull out of her cabinets as I do."  Yah, whatever.  Suck it up, buttercup.  If Carrie can do it, you can too.

Painting the Kitchen ~ Day 1

I have needed/wanted to paint my kitchen for some time now.

There are two things holding me back:  it's a BIG job, and it's the last room I haven't done anything to yet.  Sure, I hung up my own clock, added the countertop dishwasher, and put some of my own stuff in the cabinets, but otherwise, it looks pretty much exactly like my mom and dad had it.  The flip side is that it is looking pretty gungry.  The paint and arborite on the cabinets is chipped.  My foster beagle, Annie, suffered from separation anxiety, and tried to dig her way through a door frame, which is still shredded.  Just a little bit, but still, should be fixed.  I never did like the wallpaper border - a country theme of strawberry baskets and flowers.  A while back, a piece of the border became unstuck from the wall and I became obsessed with getting it off.  I stayed up until the wee hours of the morning peeling flecks of the border off the wall.  I never did get all of it off, but there is a weird white strip where part of it used to be.

So, like it or not, it's time.  I have this terrible feeling that I'm going to end up documenting this like "Painting the Kitchen - Day 34."  Please, if you're reading this, send me productive wishes!

Day 1:  I worked in the garden in the morning, had lunch, and a snuggle with Gabe n Arch.  I didn't actually get going on the kitchen until almost 2:00, but then I worked for a good 4 hours plus.  And, I boogied!  I started by hauling everything from the china cabinet into the basement; and then I moved the china cabinet into the living room.  Then the remainder of my stuff was crammed into the china cabinet or relegated to the basement.

The plan for Day 2:  Clear off the countertops, wash everything down, remove the rest of the wallpaper border.  If I'm lucky, I might start patching and sanding.

The sink area BEFORE:


The china cabinet area BEFORE:


Yay, cabinets empty!


Yay, china cabinet out of the road!


Wallpaper border, be gone!

Saturday, May 29, 2010

Veggies slowly getting planted

It has been raining most of the week here, putting a damper (da da da dum!) on much garden work.

I did manage to get most of my vegetables in - we had a dry hour or two here and there.  This year I planted (or have ready to plant once the rain breaks): 
  • 6 Super Fantastic tomato plants (love these!)
  • 1 Celebrity tomato plant (a gift; the first time I've tried this variety)
  • 2 Lemon boy tomato plants (these will go into barrels - still not planted)
  • 2 Sweet Millions tomato plants (the best cherry tomatoes I've ever grown, which also still need to be planted into barrels)
  • Kentucky Wonder pole beans (they did so well last year!)
  • Royal Burgandy beans
  • Dark Green zucchini (a staple in my garden)
  • Gold Rush zucchini (first time I'm trying this one)
  • Butternut squash (first time I'm trying these)
  • Yellow scallop squash (first time I'm trying these too)
  • National Pickling cucumbers (I've never even tried any other varieties)
  • Sugar Snap peas
  • Detroit Dark Red beet seeds that I had left over plus Formanova beets (first time I'm trying the Formanovas, which are cylindrical)
  • white and yellow onion sets, which a neighbour passed over because she had too many
  • 6 Jalepeno plants (still need to be planted in barrels)
I also put some herbs in my herb bed, but I'm too lazy to go out in the rain to double check the tags.  I think I put in:  peppermint, Greek oregano, parsley, and ... some kind of sage??

Last year, I put epsom salts into each hole I dug for a tomato plant.  This year, of course I forgot to buy epsom salts.  Hoping to get the tomatoes in before the rain hit, I decided to try out one of my mom's tricks:


A banana peel in the bottom of each hole (it releases potassium).

So, I got the tomatoes in and caged, and the bed "fenced" with plastic chicken wire.


The "chicken wire" is not to deter chickens, but rather monkeys.  Otherwise, my veggie beds are deemed a comfortable place to suntan.


I read an idea in Gardens West magazine last year, and decided to give it a try this year.  They suggested saving your sunflower stalks to make teepee trellises with.  I "built" two very simple ones for my cucumber bed.


I debated stringing twine at intervals to make a nice sort of ladder for the vines to crawl up, but between being short of twine, watching the rain clouds gather, and deciding that it might be easier to harvest cukes on the inside of the trellis without a bunch of twine impeding things, I decided to just leave them as is.  If the cukes don't like climbing the bare sunflower stalks, its no big loss - they'll still grow.  And then, I'll know better for next year.

This is the School of Yard Knocks after all.

Friday, May 28, 2010

Pysanky!

Okay, this post is a little late, but better late than never.

The "girls" in my family traditionally get together on Good Friday to decorate Ukrainian Easter eggs, aka pysanky.  This is supposed to be done before Good Friday, but it is the one day that we are all free from school and work; and those of us with small children have easy access to childcare (aka daddies!).  I also justify our date choice by pointing out that "English" Good Friday is almost always before Ukrainian Good Friday, thanks to the Julian calendar ;-)

This year, the "girls" included myself, my sister Corrine, and Corrine's adult daughters - Marie, Michelle, and Marissa.  My Auntie Mary (my mom's sister) dropped in for a quick visit but did not do any eggs this year.

Pysanky have a long and rich tradition - every line, every symbol, every colour on the egg is meaningful. The eggs must be raw, and ideally from a henhouse with a rooster - the yolk symbolizes the rebirth of the sun and of Jesus, and so if there is no chance of life coming forth from the egg, its purpose is lost.  The decoration of pysanky predates the arrival of Christianity in Ukraine.  The original pagan symbols celebrating the rebirth of spring have been adapted to the story of the rebirth of Christ.

Designs are drawn on the raw eggs with a stylus, or kistka that is filled with melted beeswax.  The beeswax turns black as it melts, making it easy to see the designs.  The eggs are dipped in progressively darker colours; whatever you want kept white is drawn on before dipping the egg in yellow; whatever you want kept yellow is drawn on before dipping in orange, and so on through the colours.  Most traditional eggs are dipped in red, brown, or black as the final colour.

Once the egg has been completely dyed, the wax is melted off.  I've read that you can do this in an oven, but traditionally, you hold the egg over a candle flame.

Dyes and snacks at the ready:


Pysanka artists can draw intricate designs freehand.  The rest of us cheat.  Most egg designs have some kind of "division."  Sometimes, it's very simple, like dividing your egg in half, so that you can make the same design on both sides of the egg. Some times the division is much more intricate - dividing the egg first in half, and then each half into quarters, sixths, or eighths.  If you use elastic bands it helps you eye the divisions before you actually start writing on the egg with the kistka, and it also helps keep your lines straight.


Sometimes, elastics don't do the trick.  Sometimes, it's the nature of the design; sometimes the nature of the egg.  When elastics don't cut it, you can pencil in guidelines before using your kistka.  I personally don't like using pencil, because the marks stay on the egg.


Once you have your divisions - whether by elastic, pencilling, or freehand - you start using your kista to fill in the areas that you want to remain white.


After your white lines/areas are filled in, the egg goes into the lightest dye, most often yellow.


And then you use your kistka to fill in the areas that you want to keep yellow.


You dye your egg progressively darker colours.


This egg (and others we were working on) is ready to melt!  It was dyed black as its final colour.  Now, the black beeswax needs to be removed.


Melting ...


Melting another ....


Melting a really colourful one ...


Done!


Thursday, May 20, 2010

To-Do List: Paint the Kitchen


My summer vacation started today - yay!  I have no "vacation-y" plans.  I purposely choose my vacation days to co-incide with the busiest time of the year in the garden - late May and late Auguest.  This year, however, I planned to tackle an indoor project as well - painting my kitchen.  It was last painted by my Mom and Dad, um, twelve years ago?  It's looking grungy, and the strawberry-basket wallpaper border has really got to go.

Thanks to "someone," my plan must now become a reality.  I can't make excuses and back out.  I believe "someone" was using his little beagle paws to try to scale the counter and gain an advantage over the pizza I stupidly left sitting there.  He shredded the paint on one cupboard door, and I peeled away a little bit more.  Ironically, the green paint underneath is very close the colour I was planning to repaint.

C'est la vie.  One paint job and one beagle pedicure coming up.  On the bright side:  he didn't get the pizza.  I'll bet he's dreaming little beagle dreams about that, planning his next attempt, as I type this.

Wednesday, May 19, 2010

Happy Birthday, Mom


I started this blog on Mother's Day in 2009. I thought it was apt to begin on that day because my mom was an avid gardener. Her "wish list" for her birthday (May 19) and Mother's Day always included annuals. She preferred pansies and petunias and impatiens. The garden I work in now was once hers. I see her work and her vision every time I look out my backdoor. I am grateful for the tulips that pop up every spring, the massive peonies, the Chinese lanterns, the saskatoons and the raspberries, and, yes, even the chives.

My last post was in October 2009. I became overwhelmed in the fall - it felt like there was so much to do everywhere in my life. I'm sure most people feel this way from time to time - once you fall behind a little, it becomes hard to figure out how to catch up.

And, so I took a break. I didn't do much yardwork in the fall. I didn't get my winter tires put on. The dust bunnies did their magic and I missed recycling days. I didn't do a single scrapbooking page. I didn't blog here.


As I am sure is the same for everyone, once one big project is under control, everything else starts shifting into place. Things are looking up. Projects are getting done. I've started working on the yard, a little here and there. The grass is in sorry shape. The weeds are like the dust bunnies, proliferating like crazy. But, my mom's tulips and her saskatoons are blooming. Her chives are budding and the peonies are on their way. Every time I look out there, I see another reminder of my mom.

I bought a yellow rose bush (Persian Yellow) and planted it in my mom's garden today. Happy Birthday Mama Bear. I promise to keep trying my best.